Getting Started
There is a wealth of introductory information available at https://code.visualstudio.com/docs/, including guides and videos.
In addition, when you start Visual Studio Code and get the welcome screen, there’s a “Learn” section with some interactive ways to learn about the program from within the program.
The Command Palette
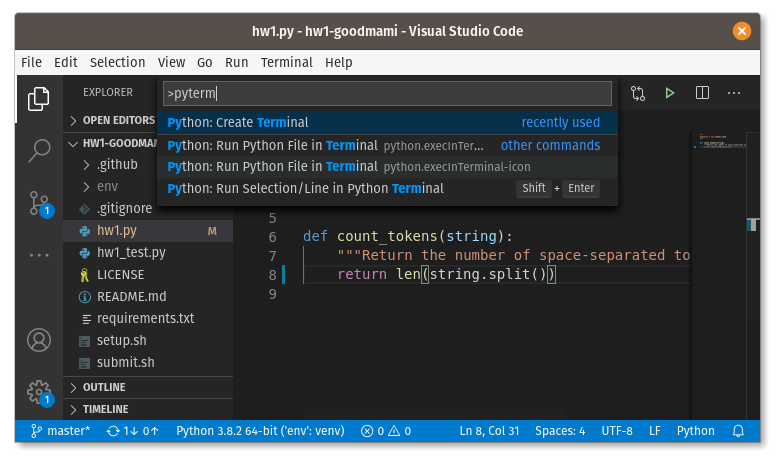
One feature I would like to point out is the “command palette”, which
is opened by F1 on all platforms, or Ctrl-Shift-P
on Windows/Linux or ⇧⌘P on macOS, or via the menu
View > Command Palette. This acts like a search of
menu items and allows access to some features not in the menus. In
particular, when you have a Python interpreter selected, you can search
for “Python: Create Terminal” (or some abbreviation, e.g.,
pyterm is probably sufficient), which opens a terminal with
the appropriate virtual environment already active. Another useful
command is “Python: Configure Tests”, which helps you setup
pytest for testing your code.
Accepting Assignments
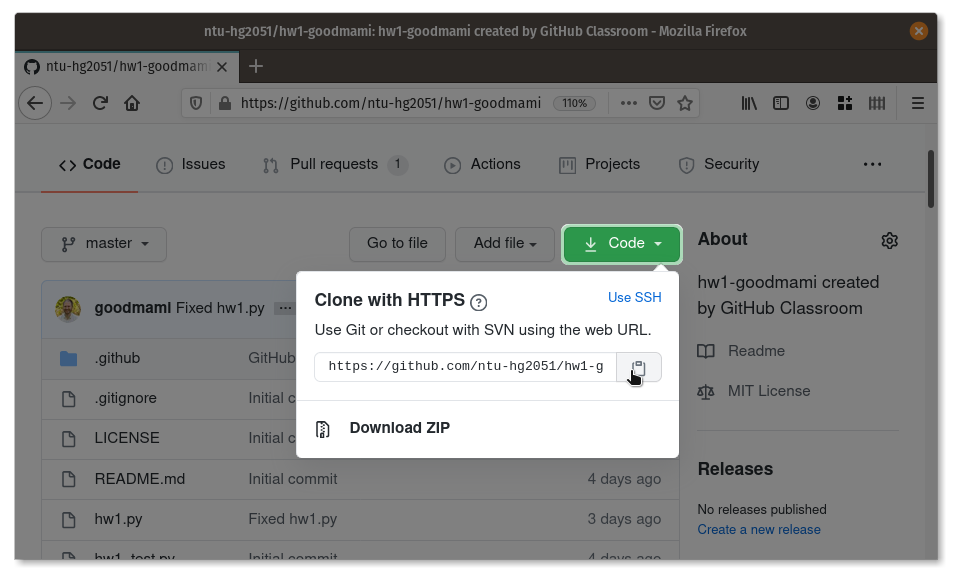
When you receive a link to accept a new homework assignment, you will be directed to GitHub and it will give you the URL of your newly created project. Now we can download (“clone”) the repository. From the project page, copy the URL of the Git repository via the green “Code” button:
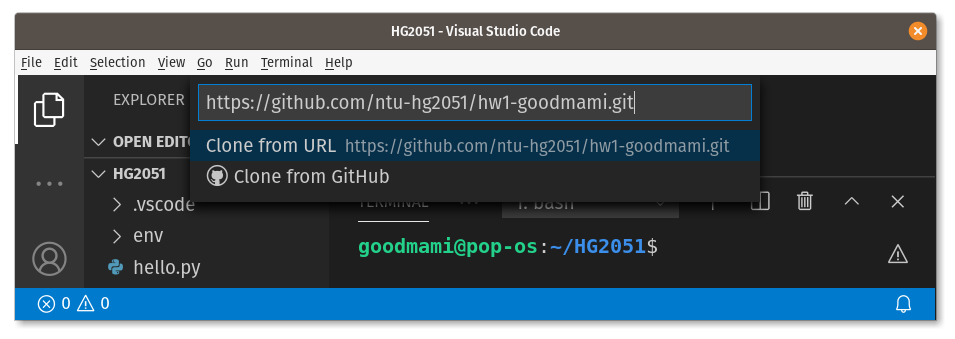
Now go to Visual Studio Code and pull up the command palette. Type “clone” and select “Git: clone”, then paste the URL you copied and select “Clone from URL”. You may alternatively do “Clone from GitHub” and search for your repository by typing “ntu-hg2051/” and the name of the repository. In this case you don’t need to get the URL from the project page. Visual Studio Code will next ask you where to store the repository. This is the folder into which the repository will be cloned, so you should choose your “HG2051” folder.
Once it has downloaded, you’ll see its folder in the explorer sidebar. Visual Studio Code should ask if you wish to open the folder or add it to the current workspace. Please choose “Open” or “Open in New Window”. Please do not choose “Add to Workspace” as that will complicate our setup (it activates a feature called “multi-root workspaces” which we are not using).
Working on Assignments
With an assignment cloned and its folder opened in Visual Studio
Code, you should now create a virtual environment for the assignment.
Follow the instructions for creating a virtual
environment, but using your assignment folder instead of “HG2051”.
When you’re done, ensure it works by using the command palette to create
a new Python terminal. You should see (env) at the
beginning of the prompt.
At this point you should install the dependencies:
pip install -r requirements.txtSet up Visual Studio Code for testing by opening the command palette
and searching for “Python: Configure Tests”. For the testing framework,
select “pytest”. For the testing location, choose . (root
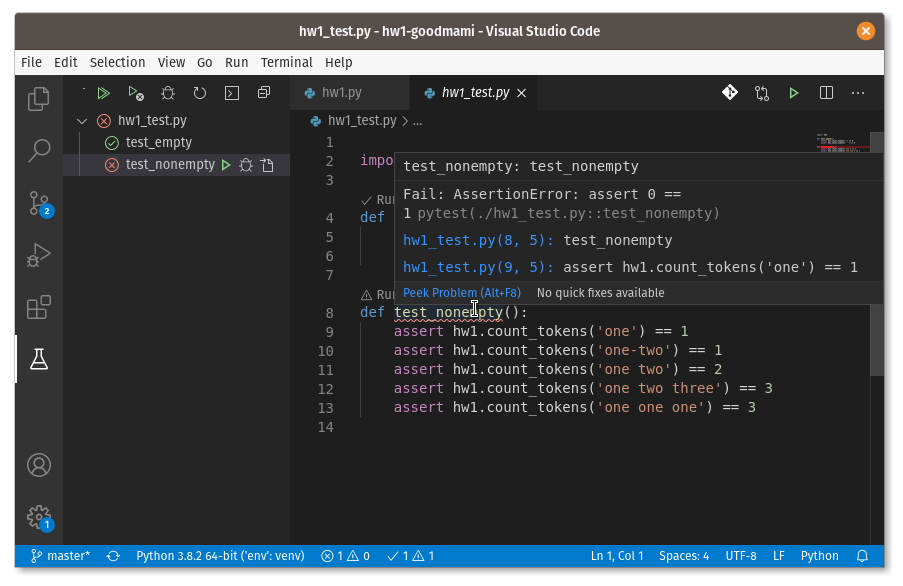
directory). If successful, you will see a beaker icon on the left. When
you click that icon, you’ll get to the testing view. Click the
“double-green-triangle” icon at the top of this view to run all tests.
If any failed, the filenames will appear with a red “X” in a circle.
Clicking on such a filename shows you the tests that failed in the
editor area. Hovering over a red-squiggly line on the failed test will
show you the exact error message.
To complete your assignment, edit the code in the main Python files
(e.g., hw1.py) and run the tests again until more or all of
them pass. When you’re satisfied, you can proceed to submit the
assignment.
Do not edit the given test files (e.g.,
hw1_test.py). Changing the tests instead of the code may
constitute academic dishonesty and can have severe consequences.
However, it is acceptable and even encouraged that you augment the tests
with your own. You should create a separate file for this, just ensure
it has _test.py in the name, such as
my_test.py.
Submitting Assignments
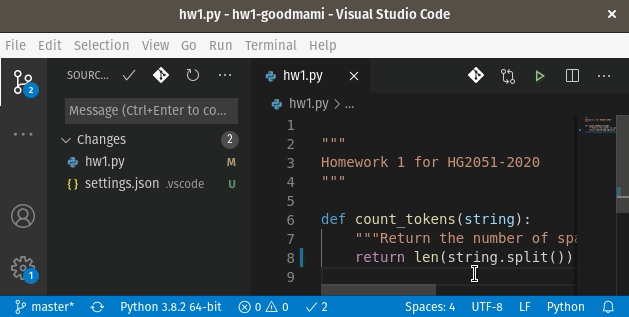
When you’ve saved some files in your assignment, you’ll notice the
SCM icon (a Git graph with 3 nodes on the left) has a number in a circle
indicating how many files have been modified. When you’re ready to
commit some or all of those changes, click that icon to get the
source-control view. Files with an M are “modified”,
those with U are “untracked” (i.e., new to Git), and
those with D are “deleted” (i.e., tracked in Git, but
deleted locally). All of these changes need to be “added” to Git (even
deleted files) in order to be recorded in the repository’s history. To
add a change, hover your mouse over a file name and click the
+ icon to stage a change. When you’re finished staging
changes, type in a commit message in the “Message” box and click the
checkmark to commit. Once you’ve made one or more commits, don’t forget
to “sync” the commits with GitHub by clicking the circular-arrow icon at
the bottom of the window.