Getting Started
There is a wealth of introductory information available at https://code.visualstudio.com/docs/, including guides and videos.
In addition, when you start Visual Studio Code and get the welcome screen, there’s a “Learn” section with some interactive ways to learn about the program from within the program.
For the purposes of our workflow, we will make use of three elements: the file explorer, the editor, and the terminal. By the end of the course you should be comfortable moving between these elements to develop your code.
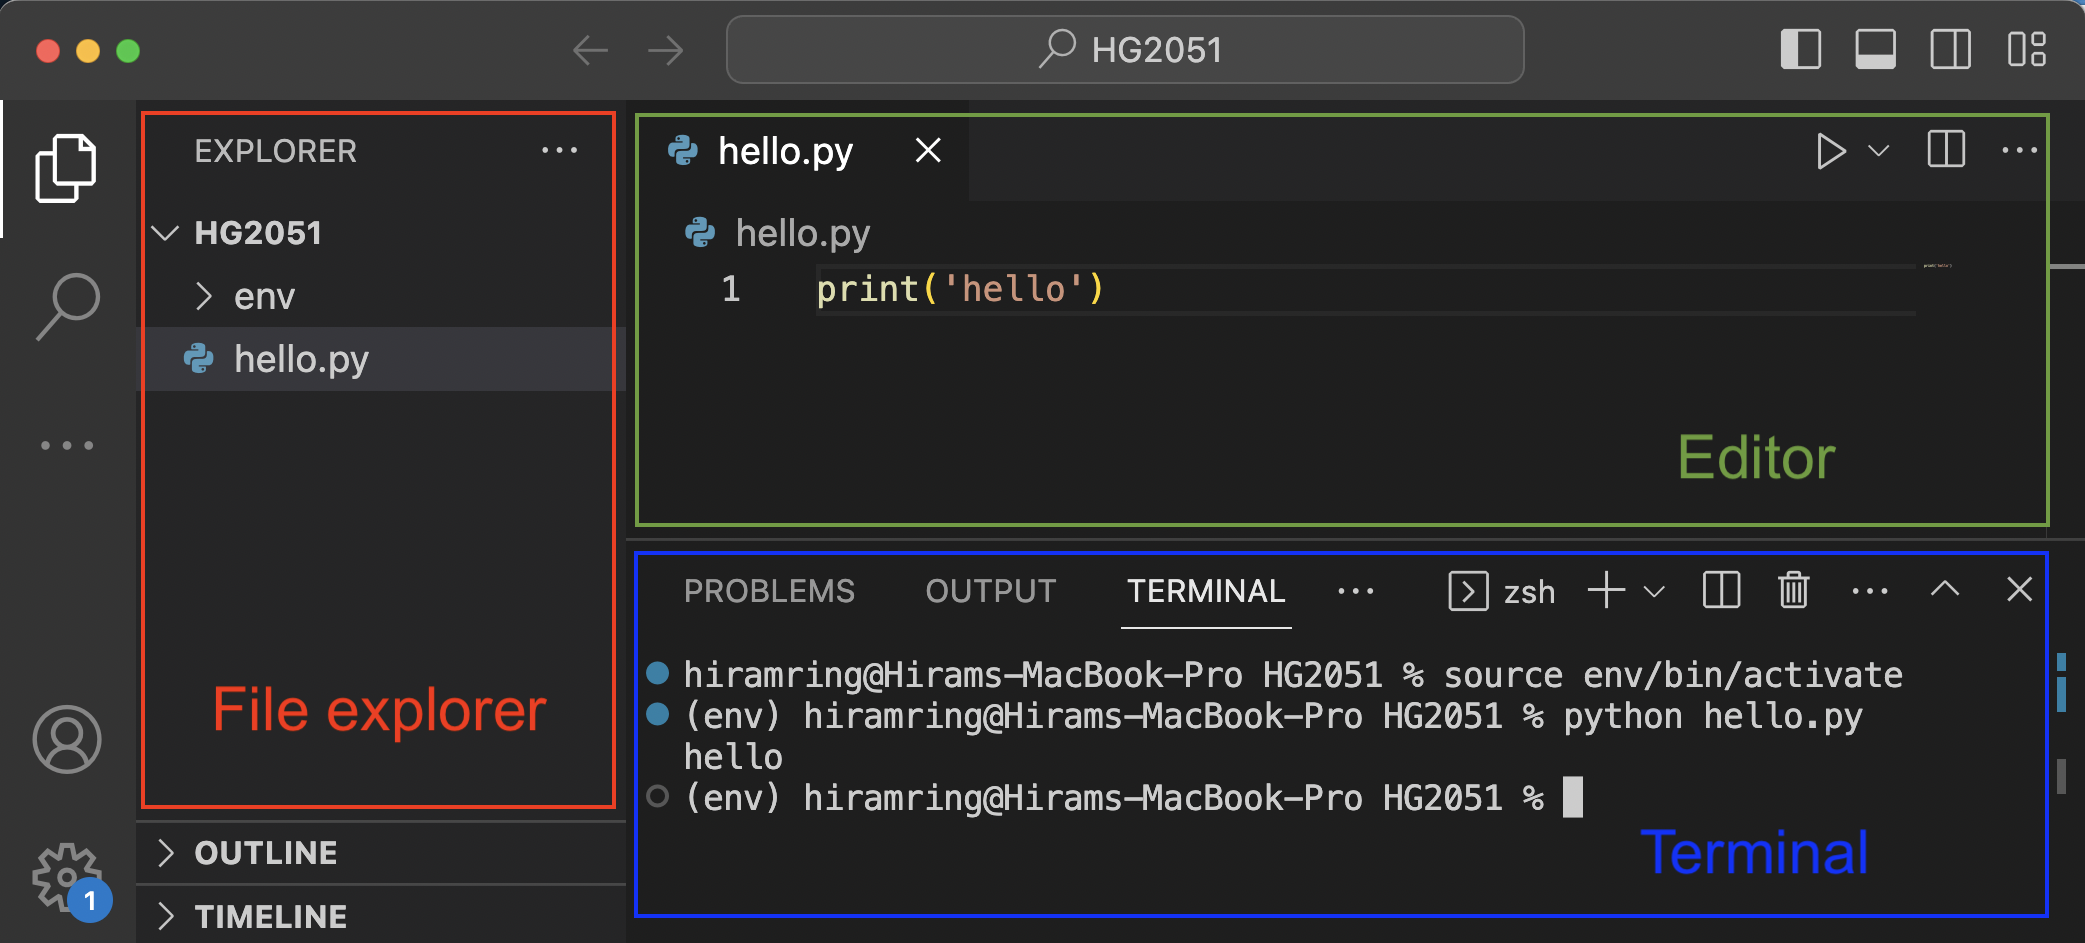
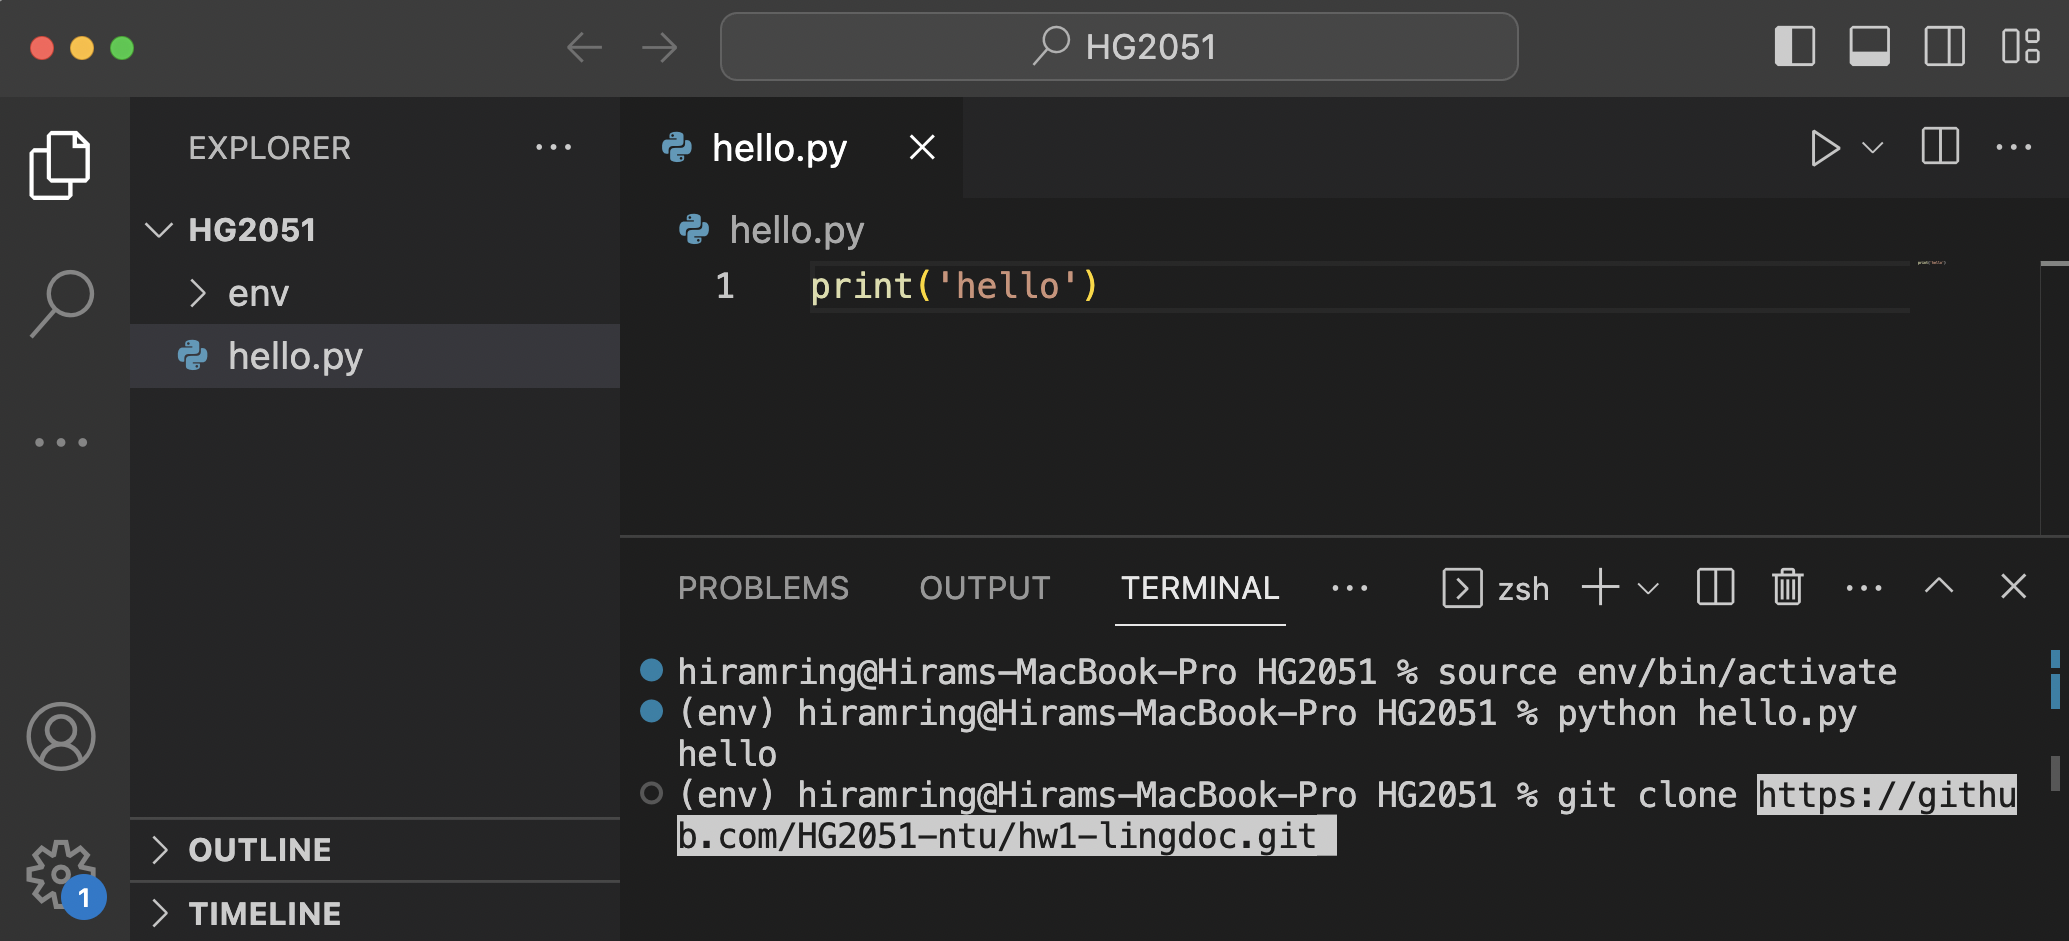
File explorer
This is where your programming files are located, along with various
subfolders for organizational purposes. When you set up your environment
you created a virtual environment (env in the image above)
which is essentially a subfolder that stores all the libraries and
packages you use in your code. You should not need to access this
subfolder, so you can ignore it. You will create subfolders for each of
your homework assignments and projects, however, so it’s good to be
aware of how the file explorer is organized.
Editor
When you open a file to work on, it opens in your editor,
which allows you to write/modify code. Visual Studio Code, like many
editors, can recognize the syntax/commands of various programming
languages. If your file is saved with a .py extension, it
will recognize the file as being written in the Python programming
language and will provide various colors and highlighting that makes the
code easier to read and debug. The line numbers are also helpful for
allowing you to find errors quickly when you are running your code.
Terminal
After saving your work (Ctrl-s or Cmd-s), the terminal is where you can run the file. This is also known as the “command line interface” (CLI) since it is used for running commands. As you type commands, notice the prefix that precedes them, composed of 3 parts separated by spaces in the screenshot above.
- The first part
(env)identifies that the virtual environment is active. This should always be the case when you are running code. The environment was activated by the commandsource env/bin/activate. - The second part is the name of the user and the name of the computer being used.
- The third part
HG2051is the name of the folder (location) where the commands are being run.
The command line or
terminal is where you will run your code to
check that it functions. To run a Python file, simply type the command
python (or python3) followed by a space and
the name of the python script (typing the extension is optional). To
speed things up, you are usually able to simply type the first few
characters of the name of the script and use the Tab key to
autocomplete it. Then press Enter or Return to run
the script. If there are no errors, you will see nothing in the terminal
unless you have written print() statements into the
code.
Going back and forth between each of these elements of your development environment gives you immediate feedback and allows you to catch errors in order to fix them and achieve working code. We will be following this workflow throughout the course to improve as coders.
If you are still unclear on how these elements are connected, a good overview can be found here - this overview starts with the terminal or command line and explains how to use commands to navigate your folder structure.
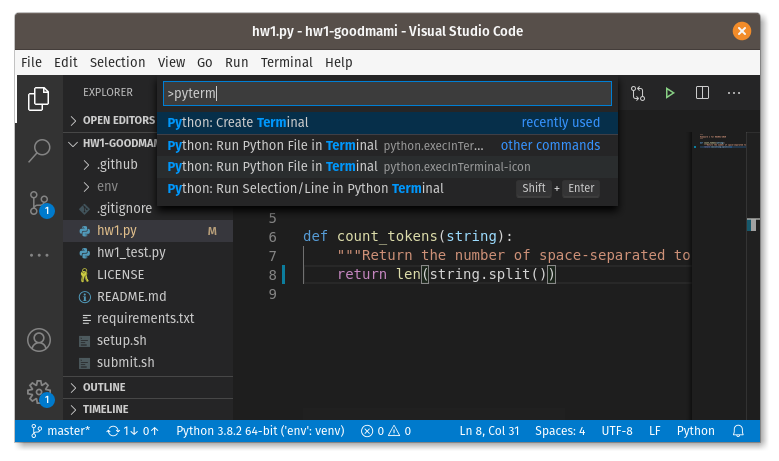
The Command Palette
One additional feature I would like to point out in VSCode is the
“command palette”, which is opened by F1 on all platforms, or
Ctrl-Shift-P on Windows/Linux or ⇧⌘P on macOS, or
via the menu View > Command Palette. This acts like
a search of menu items and allows access to some features not in the
menus. In particular, when you have a Python interpreter selected, you
can search for “Python: Create Terminal” (or some abbreviation, e.g.,
pyterm is probably sufficient), which opens a terminal with
the appropriate virtual environment already active. Another useful
command is “Python: Configure Tests”, which helps you setup
pytest for testing your code. Since we are primarily using
the terminal, we will not be spending much time using the command
palette, but it is a good thing to be aware of as you develop your
coding skills.
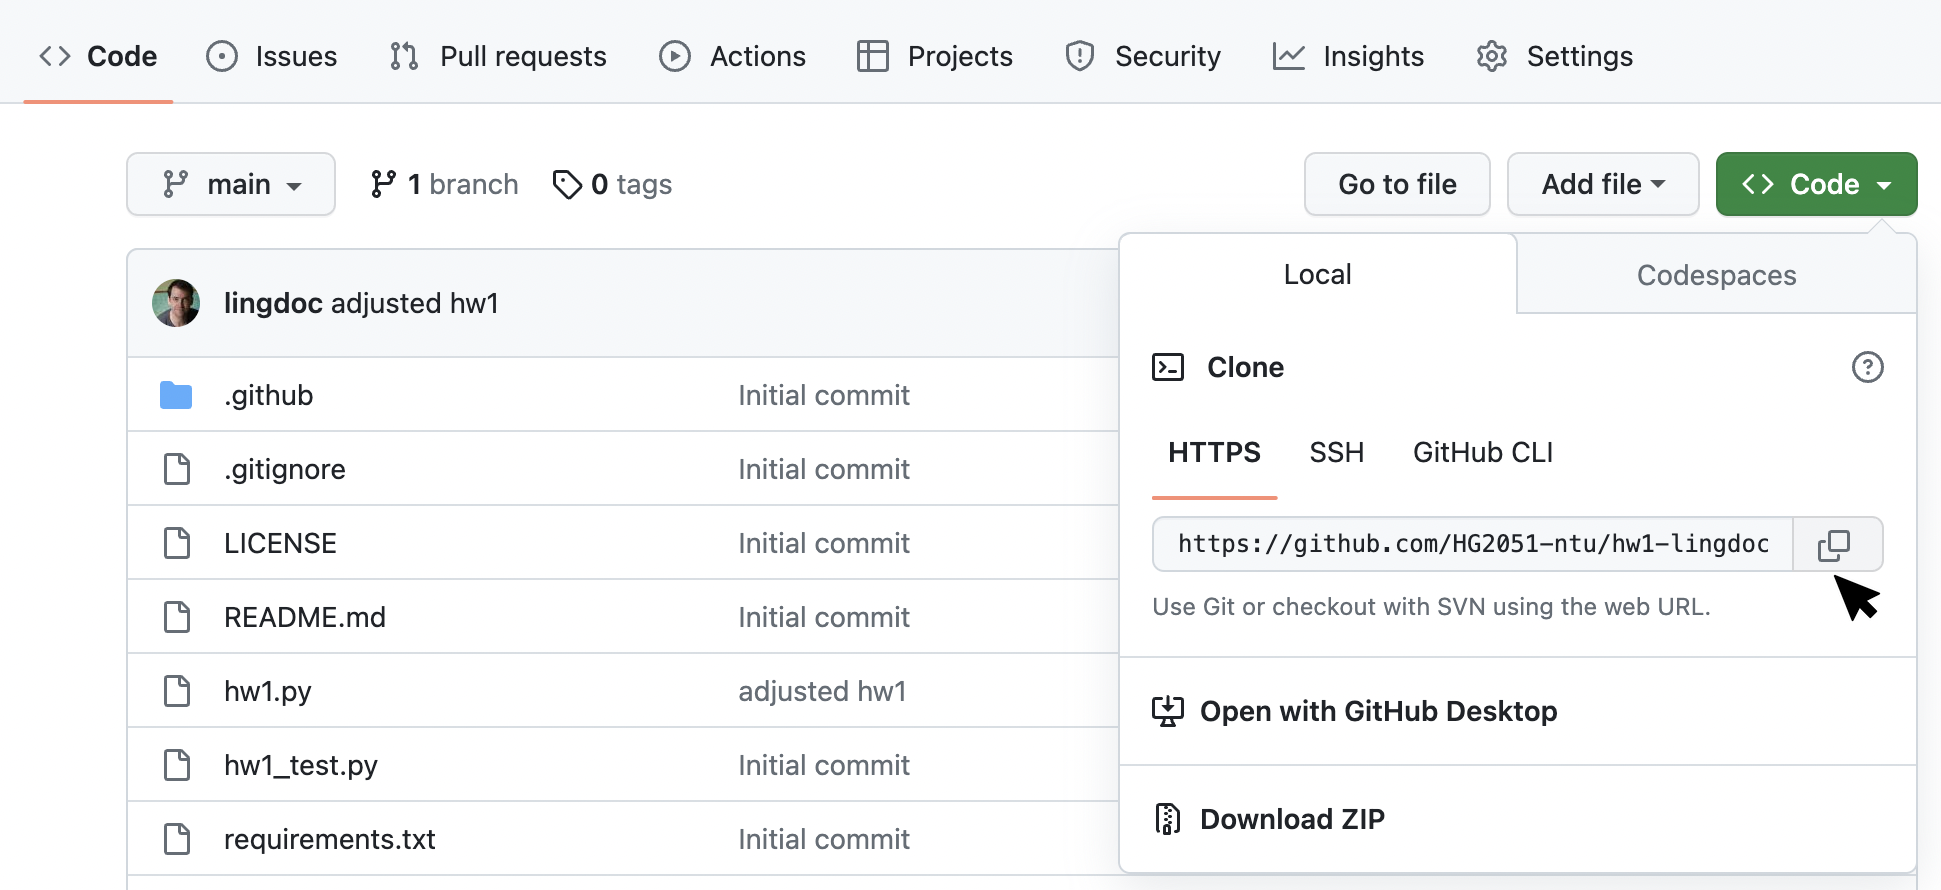
Accepting Assignments
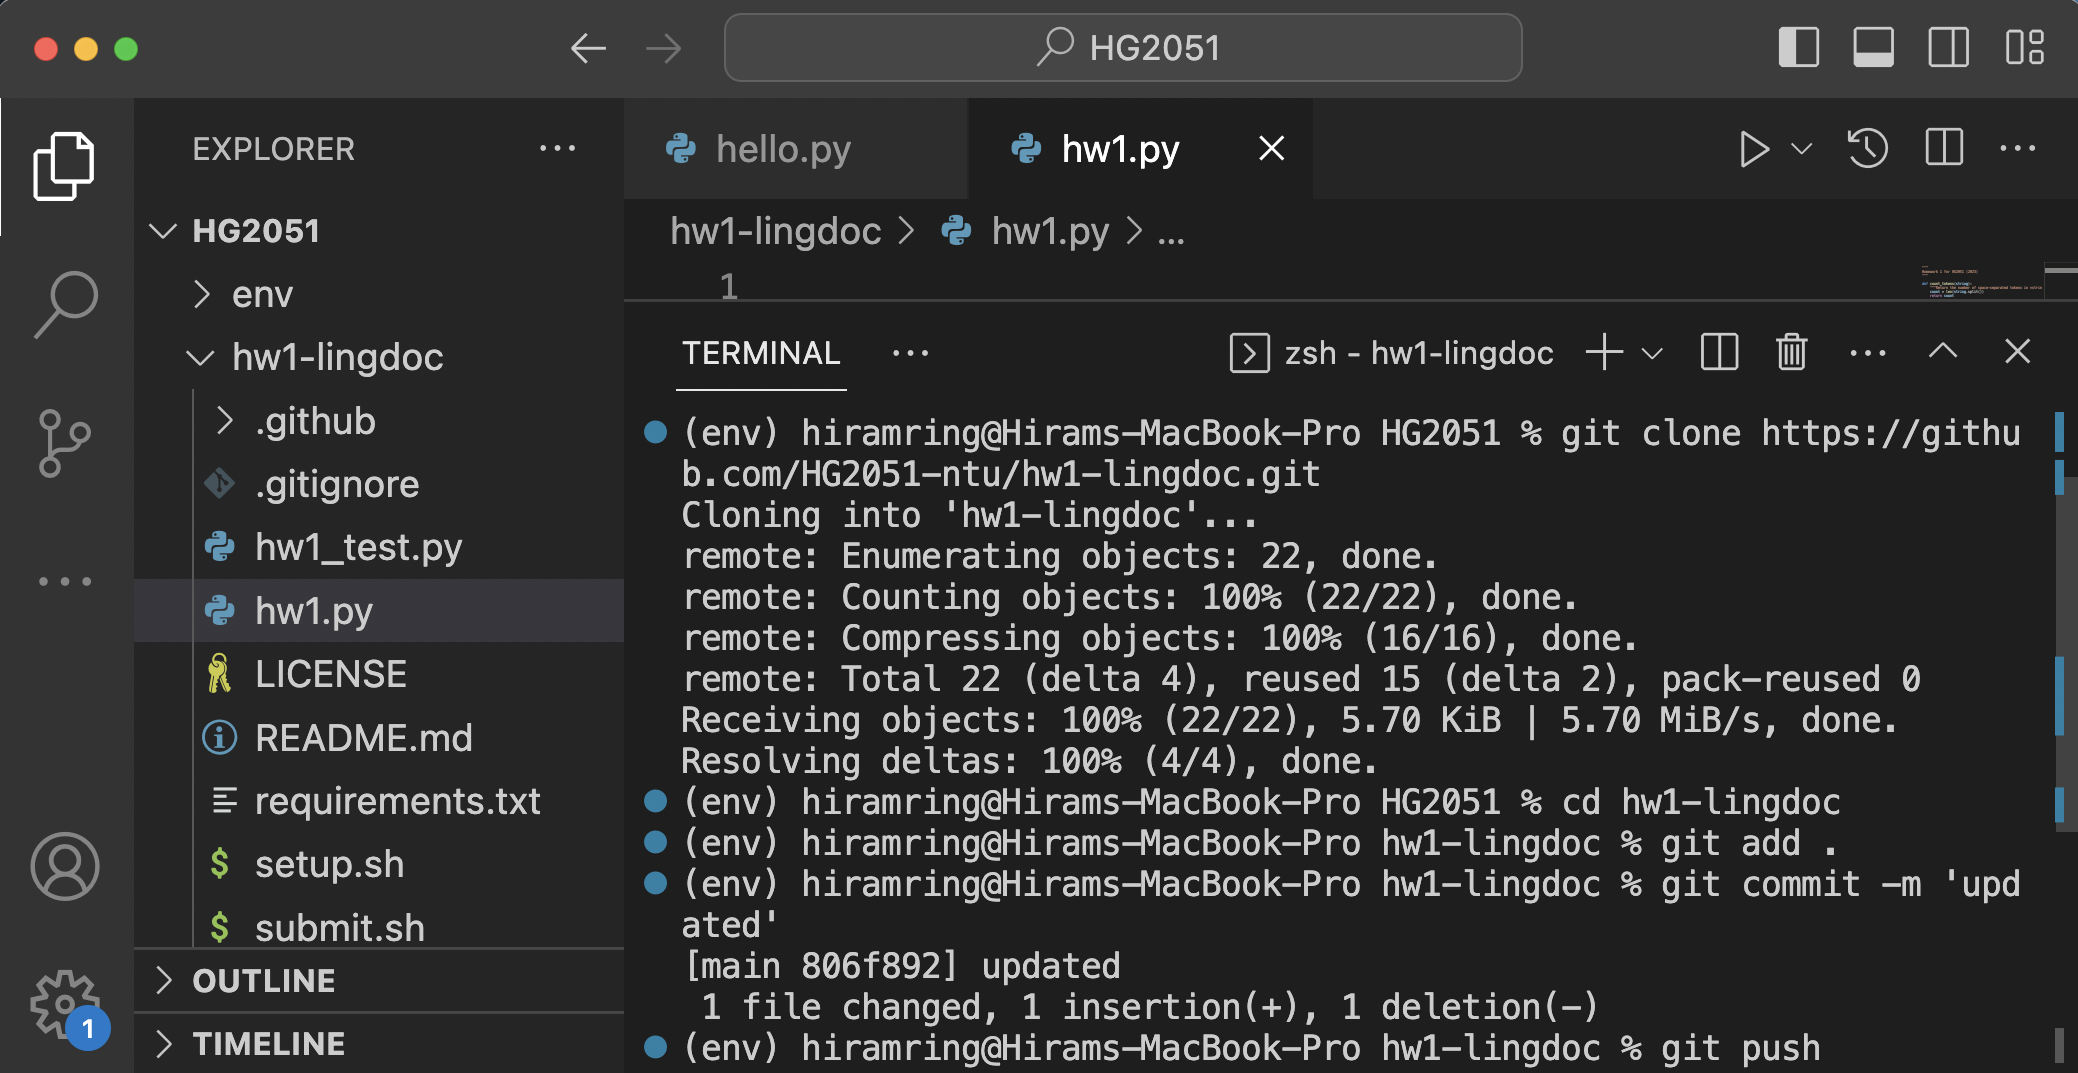
When you receive a link to accept a new homework assignment, you will be directed to GitHub and it will give you the URL of your newly created project. Now we can download (“clone”) the repository. From the project page, copy the URL of the Git repository via the green “Code” button:
Now go to Visual Studio Code and select the terminal. Make sure that
your location is the HG2051 base directory that you created earlier.
Type the command git clone followed by a space, and then
Ctrl-v or Cmd-v to paste in the URL, then
Enter. This will “clone” your project into a subdirectory of
your current directory, and allow you to push any saved/committed
changes to the online repository.
Once it has downloaded, you’ll see its folder in the explorer sidebar. Visual Studio Code should ask if you wish to open the folder or add it to the current workspace. Please choose “Open” or “Open in New Window”. Please do not choose “Add to Workspace” as that will complicate our setup (it activates a feature called “multi-root workspaces” which we are not using).
Working on Assignments
With an assignment cloned and its folder opened in Visual Studio
Code, ensure that your virtual environment for the course is activated.
Follow the instructions for creating a virtual
environment if you have not done so. When you’re done, you should
see (env) at the beginning of the terminal window prompt if
it has been activated. If not, activate it using the activation command
for your operating system, ensuring that you do so from the base HG2051
directory you created earlier. Now navigate to your assignment folder
using the cd [assignment-subfolder] command in the terminal
to change directories.
At this point you should install the dependencies:
pip install -r requirements.txtSet up Visual Studio Code for testing by opening the command palette
and searching for “Python: Configure Tests”. For the testing framework,
select “pytest”. For the testing location, choose . (root
directory). If successful, you will see a beaker icon on the left. When
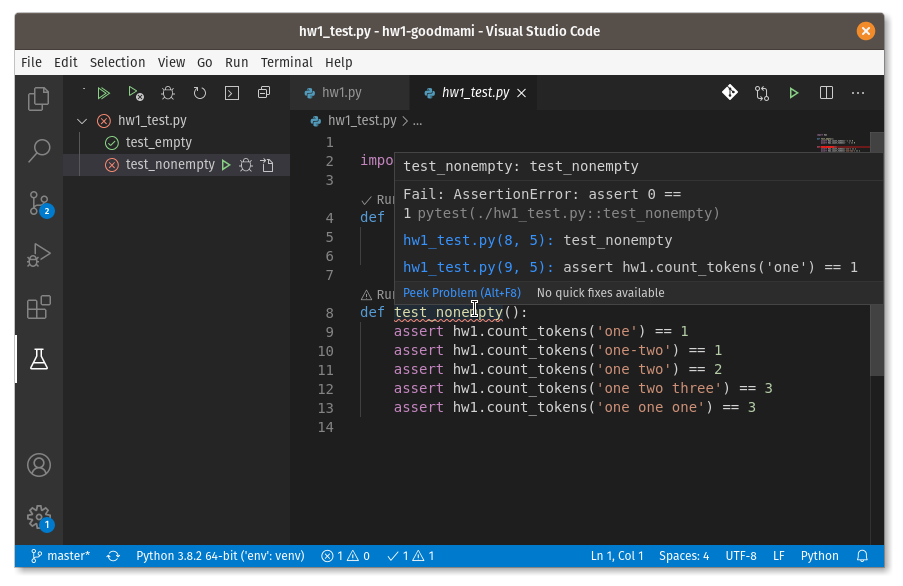
you click that icon, you’ll get to the testing view. Click the
“double-green-triangle” icon at the top of this view to run all tests.
If any failed, the filenames will appear with a red “X” in a circle.
Clicking on such a filename shows you the tests that failed in the
editor area. Hovering over a red-squiggly line on the failed test will
show you the exact error message.
To complete your assignment, edit the code in the main Python files
(e.g., hw1.py) and run the tests again until more or all of
them pass. When you’re satisfied, you can proceed to submit the
assignment.
Do not edit the given test files (e.g.,
hw1_test.py). Changing the tests instead of the code may
constitute academic dishonesty and can have severe consequences.
However, it is acceptable and even encouraged that you augment the tests
with your own. You should create a separate file for this, just ensure
it has _test.py in the name, such as
my_test.py.
Submitting Assignments
When you’ve saved some files in your assignment, you’ll notice the SCM icon (a Git graph with 3 nodes on the left) has a number in a circle indicating how many files have been modified. This is a visual way of identifying and committing changes in your repository. However, we will focus first on understanding the terminal commands related to Git (we will cover this in the first few classes).
For now, after you’ve made some changes and saved your file, type the
command git status. This will show you what has changed in
your current directory’s contents, including subfolders. To have Git
update any files you first need to add them to the tracker
using git add [name-of-file] and then commit all
your added files with a message that reminds you of your changes using
git commit -m "your message here" (don’t forget the
quotes). You can also simply type git add . to add all the
changes in a directory at once. You are then ready to update the online
repository with the command git push.