Windows
Python
For running the code we write, we will need a Python interpreter. This is perhaps the most challenging to set up because each platform does it differently. For smooth sailing in this course, try to install Python version 3.10 since that is what has been tested (3.13.5 is the highest stable version as of this writing). At the current time, NLTK requires Python versions 3.7, 3.8, 3.9 or 3.10. Earlier or later versions may cause issues with your libraries or packages that can require extensive troubleshooting.
The recommended way to install Python is to get a version from https://www.python.org: python-3.10.9-amd64.exe
On newer Windows operating systems, you will first need to disable
the auto-installer for Python by navigating to
Settings > App settings > App execution aliases or by
going to “start” and typing “Manage App Execution Aliases”. (see this
post for a screenshot). Turn off the buttons that read
App Installer [python.exe] and
App Installer [python3.exe]. Then click on the
Python 3.10.9 link above and download and run the official
installer.
During install, you should select “Add Python 3.10 to PATH”. If you
do not, then later in the terminal you may need to use py
instead of python or python3. That is, once
you have installed Visual Studio Code (VSCode - see instructions below),
if these don’t work in your terminal:
$ python --version
$ python3 --version
Try this instead (and let me know if this doesn’t work, either):
$ py --versionYou can check this using the terminal after you have installed VSCode.
See here for more information.
Visual Studio Code
Visual Studio Code is the program we use to write code. It also assists with running tests and tracking changes with Git, as well as other advanced features for developers, but we will not be exploring these for the most part.
For windows you can download an installer from https://code.visualstudio.com/.
| Windows | Download |
Recommended Extensions
Visual Studio Code is quite capable on its own, but there are extensions that can make it even more useful for certain uses. I suggest only installing extensions from reputable sources, or those with many users and high ratings, as there’s the possibility of malicious extensions. I recommend the following for now:
- Python by Microsoft
- Git History by Don Jayamanne
Visual Studio Code may prompt you to install a “linter” for Python. This is optional, but it’s probably a good idea. It will let you know when you’ve made some kinds of programming mistakes.
Using the VSCode terminal to complete setup
Take a brief read of the Using VS
Code page to get an idea of how VSCode works. We will be using the
VSCode terminal (or “command line interface”) to help us
set up Git. For now, you can simply open VSCode - don’t worry too much
about setting up a new workspace (any will do for the remainder of
setup), and focus instead on the lower right hand area of the window,
where a terminal should be. If it doesn’t show up, you can
use the Terminal menu to select a New Terminal.
Git
For tracking versions of the code we write, we will use Git. This is also how we will submit our homework assignments.
Download the latest version from https://git-scm.com: Git-2.50.1-64-bit.exe
Installation is straightforward but there are many options. Choose the default for all except for the editor, which may say “vim”. Choose “Visual Studio Code” instead.
Setup a Github account
If you haven’t already done so, go to Github and sign up for a free account with
your email address. The email will be necessary for pushing changes to
your assignments. After installing Git, set up credentials on your local
machine using the terminal commands below. To do this, open VSCode and
type the following into the terminal interface (replace
USERNAME with your Github username, and
NAME@EMAIL.com with your Github email address):
git config --global user.name "USERNAME"
git config --global user.email "NAME@EMAIL.com"
Workspace
Now that the software is installed, we need a place to work in. This workspace is a folder (directory) somewhere on your computer (e.g., on the Desktop or wherever makes sense to you). Create it in any method you like (e.g., in Windows Explorer or Finder or in a terminal). For these instructions I will assume you named it “HG2051”. This also assumes that you know what folders are and how files/folders are organized on your computer. We will be going over the basics of this in the first week of class, but to make it easier you should avoid folder names with spaces in them (you can use an underscore instead).
Once your folder is created, open Visual Studio Code and open the folder you just created via File > Open Folder. You will see something like this:
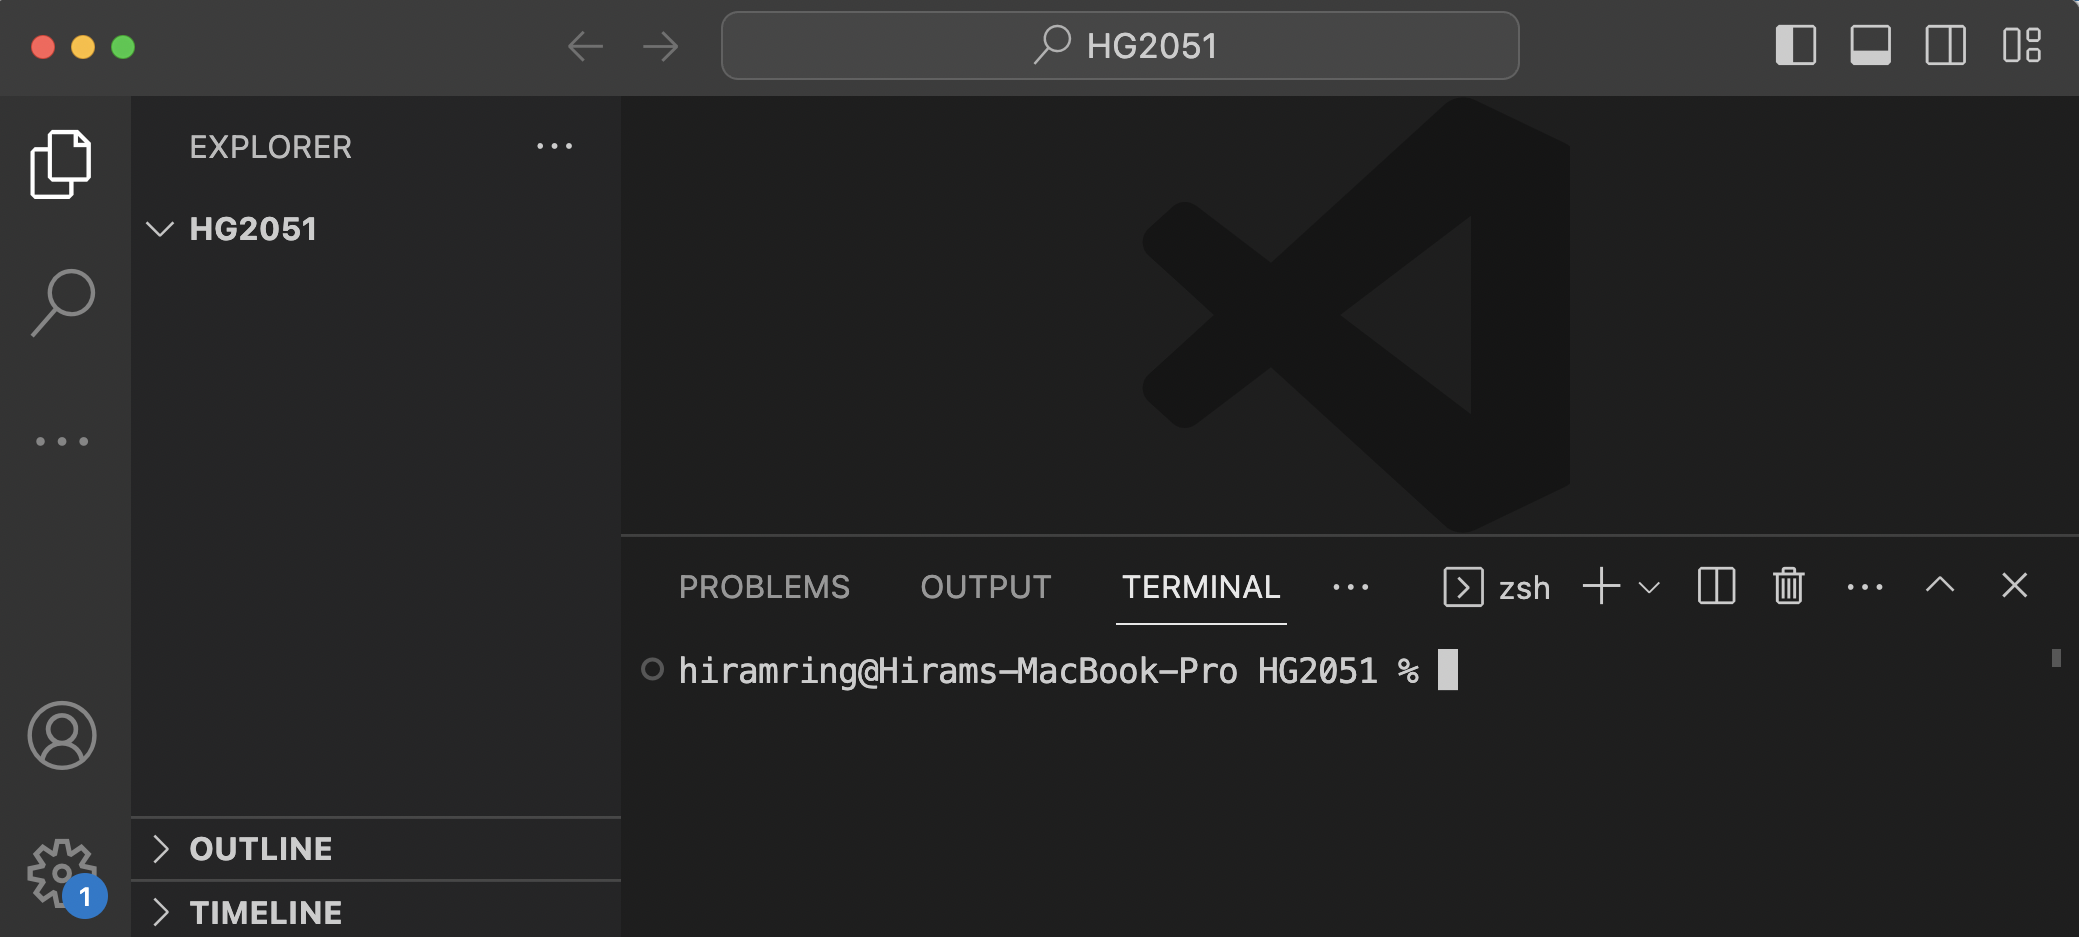
Note the “Explorer” side bar (top-left), which is a file and folder view. It shows that you are in the “HG2051” folder. In the terminal panel (bottom-right), the prompt indicates the same thing, i.e., that you are in the “HG2051” folder. If you don’t see the terminal, try pressing Ctrl-`, or use the menu View > Terminal. Note that your prompt may look a bit different, depending on which shell and platform you’re using.
Virtual Environment
The next step is to create a virtual environment, which is a subfolder that contains the Python packages we will use for this course. We will use one virtual environment for the whole course, though it is typical to use different environments for different projects.
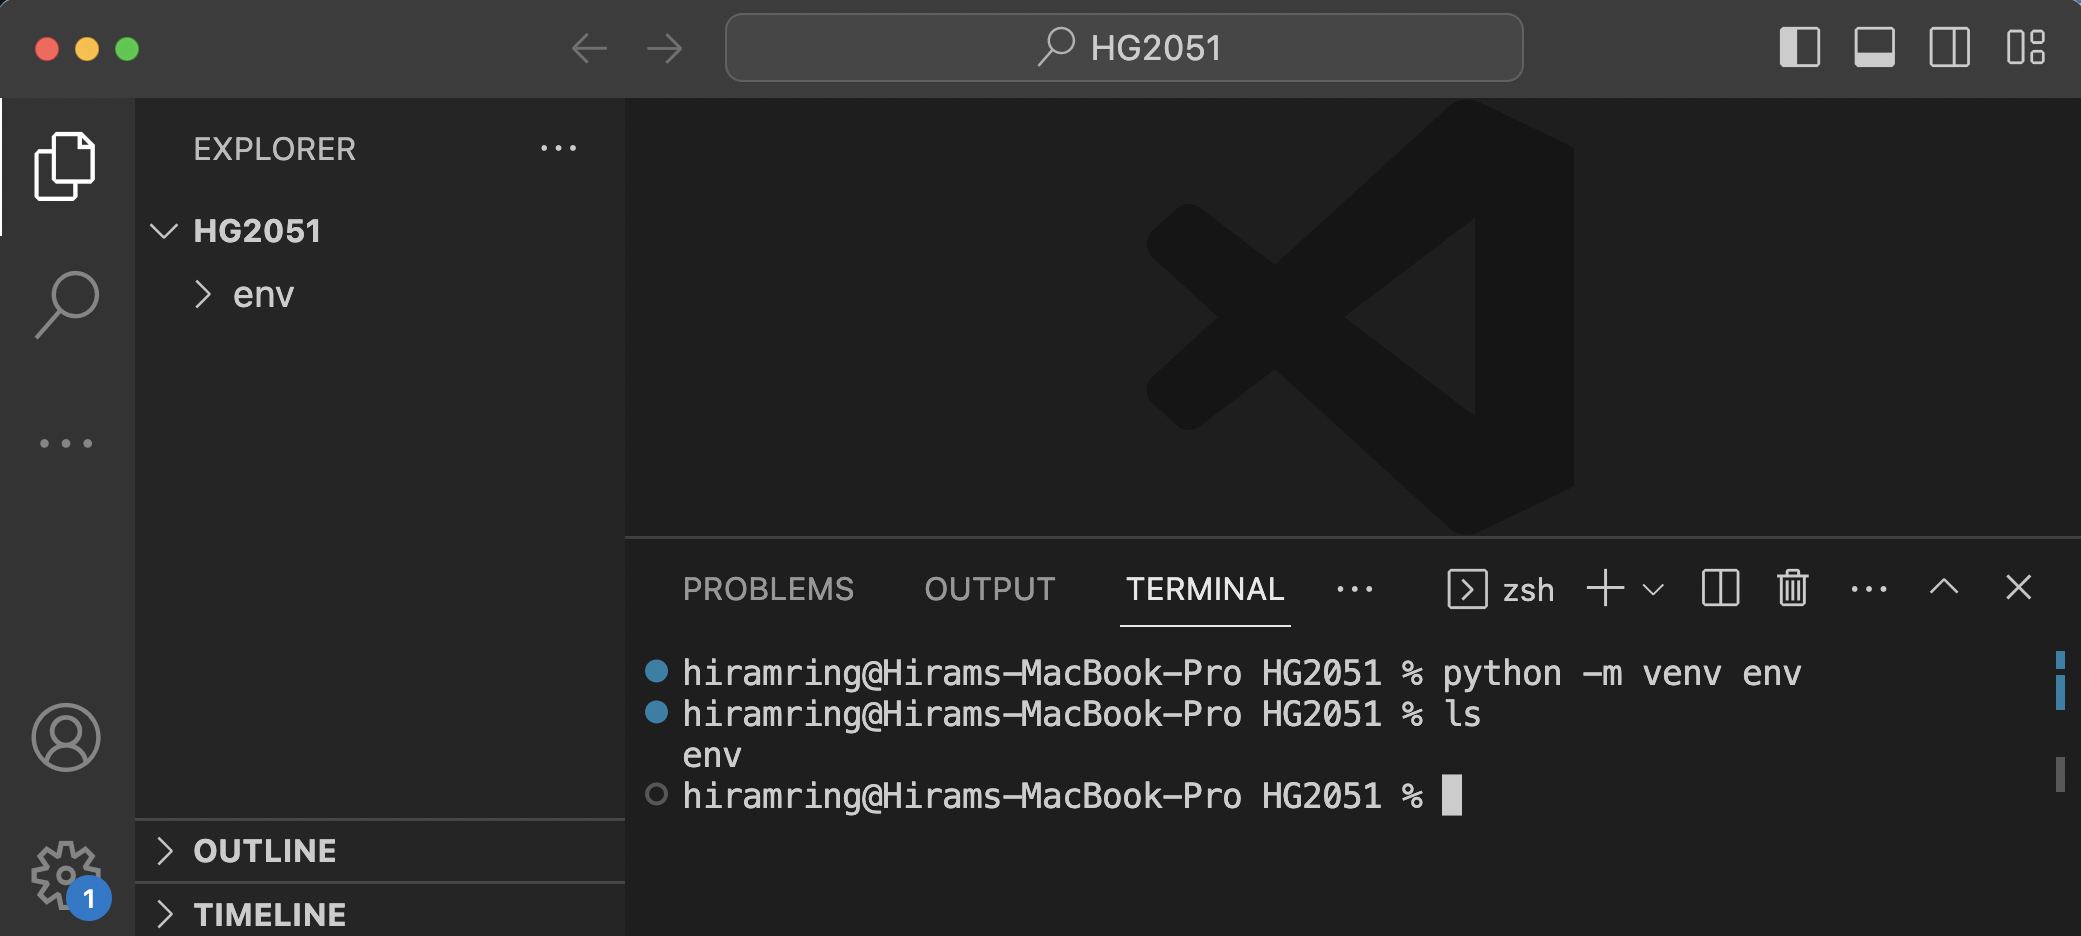
Creating the Virtual Environment
Enter the following command into Visual Studio Code’s terminal (you
may need to replace python3 with py on
Windows):
python3 -m venv envThis calls the Python module venv, which creates virtual
environments, and has it create one called “env” (you can name it
whatever you like, but let’s stick with “env” for this tutorial). If
successful, it will look like the following image.
Dealing with errors
If it did not succeed, this is likely because Windows by default
blocks you from running “untrusted” scripts. To deal with this, first,
we want to ensure that Windows PowerShell is being used as our default
terminal in VSCode. We can do this by searching for
terminal in the Command Palette
([Cmd]Ctrl-Shift-P) and selecting PowerShell as the default.
Then, to allow the current session to activate the virtual environment,
you can change Visual Studio Code’s settings so PowerShell can run these
scripts.
First, close the terminal (click the garbage bin icon), and start a new terminal to ensure we’re working with a fresh instance. Now, in the new terminal, try to execute the following:
.\env\Scripts\Activate.ps1If this doesn’t work, it may be because bash commands
are not enabled by default in PowerShell, resulting in errors. The
Bash program is installed by Git and used for committing and
pushing changes, among other things. To ensure that bash
commands are enabled, run the following command in your terminal:
set-ExecutionPolicy RemoteSigned -Scope CurrentUserThanks to THIS blog post and related Stack Overflow answer: https://stackoverflow.com/questions/1098786/run-bash-script-from-windows-powershell
If successful, you’ll see (env) at the beginning of the next prompt.
If you see any errors, please let me know. While the environment is
active, using python (instead of python3 or
py) should use the Python version included in the virtual
environment.
Also consider the following Stack Overflow answer in case you are still having issues: https://stackoverflow.com/a/61281420/1441112
After successful configuration
Now notice in the Explorer side bar that the “env” folder is created.
In the terminal, I also executed the ls command, which
lists the contents of the current folder, showing that the
“env” folder exists. You don’t need to worry about the
contents of the “env” directory except for the following:
(Windows) * Activation script location -
env\Scripts\Activate.ps1 * Python interpreter location -
env\Scripts\python.exe
If you see a pop-up like the following (perhaps when editing a Python file), click “Yes” as it will help Visual Studio Code automatically run Python code using your virtual environment:
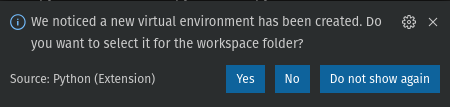
If you don’t see that, try opening the command palette and searching
for “Python: Select Interpreter”. You should see an option for
.\env\Scripts\python.exe. If not, enter or find the path
appropriate for your platform.
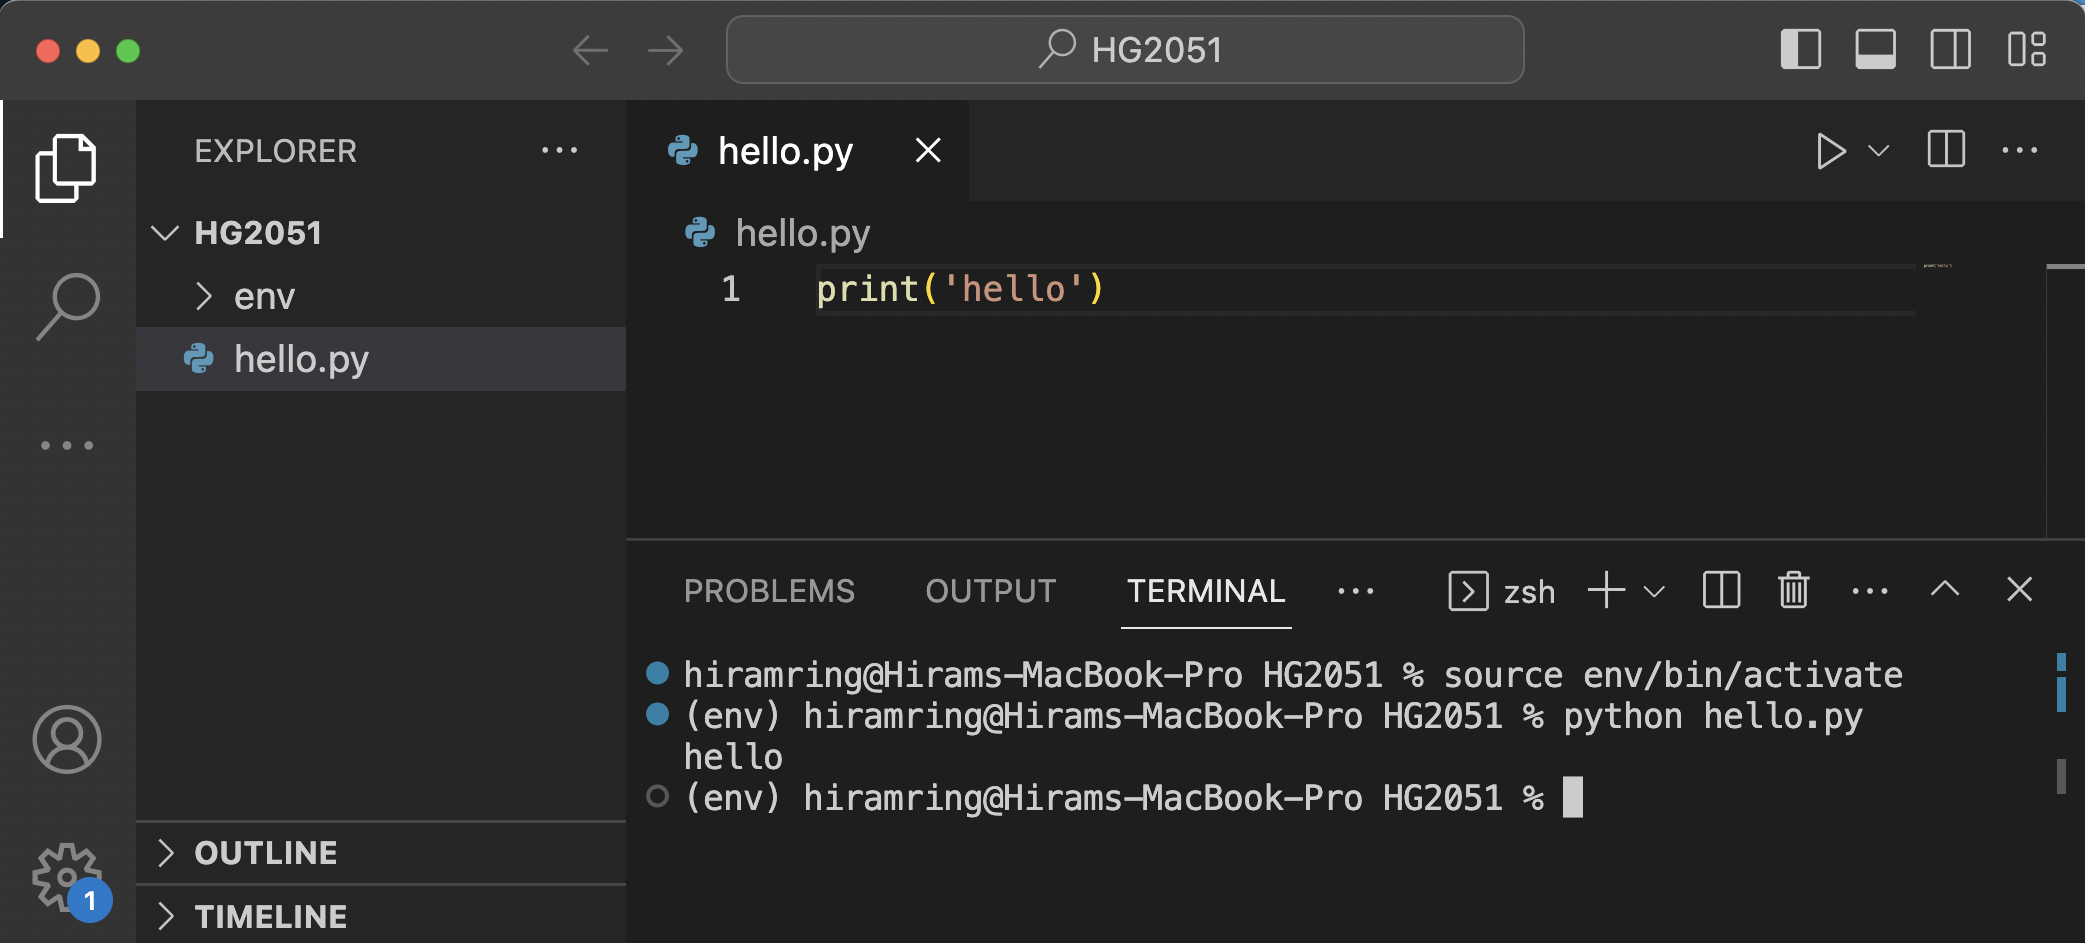
Activating the Virtual Environment
Creating the virtual environment simply makes a new folder and directories, but to use it you must activate it. An activated virtual environment directs Python to use the packages within the folder and not those installed elsewhere on your computer. On Windows run the following command in your terminal (and let me know if it doesn’t work):
.\env\Scripts\Activate.ps1Test It Out
If all was successful, you should be able to do the following two things.
Install the pytest
Dependency
We will use pytest for automatic evaluation of some of
our homework assignments. Once the virtual environment is active, run
the following command in your terminal:
pip install pytestIf it says the pip command is not found, ensure your
virtual environment is active. If it is and still cannot find it, then
try pip3 or python -m pip instead. If it still
complains after that, then please contact me.
If it is successful, you’ll see 10 or so packages being installed in addition to pytest. The others are pytest’s dependencies.
Create a hello.py
Module
Create a new file in Visual Studio Code (Ctrl-n or File > New File). Type the following into the file:
print('hello')Then save (Ctrl-s or File > Save) the
file to hello.py in your current workspace. Once it is
saved, you should see the code become colored (syntax-highlighting).
This means that Visual Studio Code recognized it as a Python file. If
Visual Studio Code also detected your virtual environment, you should
see a green “play” icon in the top right. Clicking that will launch a
new terminal with the virtual environment active (the shell type will
say “Python” instead of “bash” or “PowerShell”) and execute the Python
file. You should see “hello” in the terminal output of the command.
While it is nice to be able to use the “play” button to run a whole script or parts of the code from a script, our goal with this course is to learn how to create complete programs that run without errors. For this reason, you should avoid using the “play” button for the time being.
Workflow
The workflow we will follow makes use of three elements: the file explorer, the editor, and the terminal. You should become comfortable with moving between these elements as you develop your code. Your file explorer is where your programming files are located, along with various subfolders for organizational purposes. When you open a file to work on it, it opens in your editor, which allows you to write/modify code. After saving your work, you switch to the terminal to run the file and check that it functions. Going back and forth gives you immediate feedback and allows you to catch errors in order to fix them and achieve working code. For more details, a brief guide related to this course is provided in Using VS Code, with additional links to more comprehensive resources.